We had this collage made of my son when his photos were taken at Sears Portrait Studios. I love how the photographer created the saying with the different colored circles. I decided to use two different color polka dot backgrounds from Stampin' Up! to play off the circles. (The brown polka dot frame is part of the collage!) I also used some cute dot ribbon from DCWV across the bottom of the page. I punched circles to back three birthday plaques from Making Memories and put those on top of the ribbon. I also punched out some photo corners from the SU dot paper. Punches are Paper Shapers by EK Success.
Showing posts with label Paper Shapers. Show all posts
Showing posts with label Paper Shapers. Show all posts
Saturday, August 4, 2012
Tuesday, June 12, 2012
Day 164: True Blue Friends
My kids and my niece had their photo taken. My niece started to slip off from my son, so I love how she is trying really hard to hang on to his shirt! I selected this argyle print paper from All My Memories because it coordinated well with the colors the kids were wearing and also is another pattern to play off the plaid print of my son's shorts. I actually cut a small square of the paper from beneath the kids' photo so I could make photo corners with my Paper Shapers corner punch. The contrasting but complementary striped print adds a little bit more pattern to the page. I used yellow and orange brads from Bo Bunny to add interest to the photo corners and to the epoxy stickers from Brenda Walton for K & Company. The True Blue Friends sign is from a kit by Sharon Soneff. The black grosgrain ribbon was from my stash.
Sunday, June 10, 2012
Day 162: My Prince
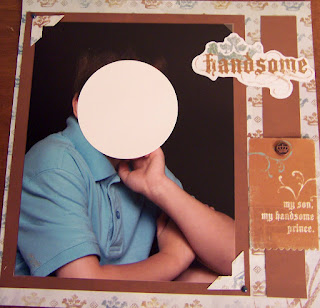
To scrap this photo of my son, I used the crown paper from the Bohemia collection by My Mind's Eye as the background page. I used the reverse side of the same print to make the brown mat and the brown strip. With my photo corner punch from Paper Shapers by EK Success, I punched some photo corners out of the leftovers from the mat page. I embellished the photo corners with blue brads from Bo Bunny. The "handsome" die cut and the "my son, my handsome prince" title tag are both part of the Bohemia collection. The crown brad is by Bo Bunny.
Saturday, May 12, 2012
Day 133: Cousins Scrapbook Page
I wanted to use this funky flower paper from My Mind's Eye as a background for this page. I made a tag to match by sponging a white tag (Paper Reflections) with blue, green, and fuschia ink from a Kaleidoscope ink pad by Tsukineko. I matted the white tag on green card stock from Stampin' Up! and punched a photo corner from a Paper Shapers punch. I had the fiber in my stash. Paper flowers from Prima helped to tie the page together as the backgrounds for the letters spelling out "Cousins" on the tag. A tattoo from KI Memories, and some buttons from Stampin' Up! added a little punch to the top of the photo.
Monday, January 23, 2012
Day 23: "My Wish" by Rascal Flatts
I love the lyrics to Rascal Flatt's song, "My Wish", and decided I wanted to use them on a scrapbook page for each of my kids. I had found the lyrics online and copied them into a file of scrapbook ideas, so that I could have them ready when I wanted to use them. Tonight I worked on my daughter's page. She was wearing a turquoise blouse in the photo, and I had a beautiful blue paper with flocked butterflies by Anna Griffin that matched perfectly, so I used that as my background paper. From another sheet of the paper, I cut out some of the butterflies and used turquoise pearls by Jolee's to make the bodies of the butterflies. I also cut out photo corners from the Anna Griffin paper with my Paper Shaper punch. I used Pioneer clear photo corners to adhere the picture to the right side of the background paper. I printed out the lyrics to "My Wish" onto Stampin' Up! Soft Sky paper and used my Fiskars paper trimmer to separate the lines from each other. Then I used my Herma adhesive runner (EK Success) on the back of each line of the lyrics and attached them on the left side of my 12" x 12" page. I placed a photo corner in the lower left and upper right corners of the photo, put a small butterfly in the upper left corner, and placed a large butterfly and a smaller butterfly at the bottom right of the photo. I used a couple of pop dots to lift up the larger butterfly's wings to add dimension to the page.


Subscribe to:
Posts (Atom)


