
Tuesday, January 31, 2012
Day 31: One month down, eleven to go!
I have managed to scrap, stamp, or paper craft something every day this month! Woo hoo! Today I got seven more notepad and pen sets done for the Men's Walk to Emmaus. Seven more to do for that and then I will start to work on the sets for the Women's Walk.
Monday, January 30, 2012
Day 30: 30 Notepad and Pen Sets Made!
So far I have made 30 notepad and pen sets. I finished up the pens that matched the cross notepads tonight. Can't wait to know actual numbers of people who are attending so I can gear up to get done for the men's walk. I was told to plan on 50 people for each walk, but I would like to do some notepads and pens that are a little more feminine for the women, and for a change of pace. I can make 6 notepads from one piece of 12 x 12 inch paper, so I have been making 6 of a pattern at a time. It breaks it up a little bit if I change the pattern.
Sunday, January 29, 2012
Day 29: The Cross of Many Colors
Worked on 6 more notepads tonight, using this cross of many colors paper by The Paper Studio.


Saturday, January 28, 2012
Day 28: Pens, pens, and more pens
My son's Cub Scout troop had their pinewood derby today, and my daughter's Girl Scout troop ran the concession stand for the event. That means we were up at 6:30 AM and at the event by 7:30 AM to set up, and didn't leave until everything was cleaned up at 2:00 PM. We came home, took naps, and went to our church at 5:00 PM for Family Fun Night, where we played Minute to Win It. So, needless to say, I am tired. I did make pens and put the ribbons for pens on some notepads I made last night. A few more sets done for the Walk to Emmaus.
Friday, January 27, 2012

Thursday, January 26, 2012
Day 26: The Cross
Tonight I worked on more notepads and pens for the Walk to Emmaus coming up. I changed to a cross pattern of paper, (The Paper Studio) to change things up a bit. Also, I am finding that the best double-sided tape for attaching the covers to the notepads is Terrifically Tacky Tape by Provo Craft.


Wednesday, January 25, 2012
Day 25: Agape Love
One of the things you learn about at Walk to Emmaus is Agape Love. People show agape love through kindnesses such as scripture cards, Christian bookmarks, etc. My agape love is expressed through my love of paper-crafting by the pen and notepad sets I have been making. I made another 6 notepads tonight, with paper that has words about Jesus on it. It was hard finding religious paper other than for a baptism or wedding at my local scrapbook stores. I finally found some at Hobby Lobby, by The Paper Studio. I guess I will have to spend some time searching the internet to find more paper to show my agape love for the pilgrims of future walks.


Tuesday, January 24, 2012
Day 24: Card Club
For Christmas, my husband gave me a gift certificate for Stampin' Up! products from a local representative, Carolyn Black. She hosts a card club at her house once a month, so I attended tonight, made some great cards (designed by Carolyn) with new products from the mini catalog, and even earned something free from the Sale-a-Bration catalog. It was a fun evening of trying out new products and visiting with old friends.


Monday, January 23, 2012
Day 23: "My Wish" by Rascal Flatts
I love the lyrics to Rascal Flatt's song, "My Wish", and decided I wanted to use them on a scrapbook page for each of my kids. I had found the lyrics online and copied them into a file of scrapbook ideas, so that I could have them ready when I wanted to use them. Tonight I worked on my daughter's page. She was wearing a turquoise blouse in the photo, and I had a beautiful blue paper with flocked butterflies by Anna Griffin that matched perfectly, so I used that as my background paper. From another sheet of the paper, I cut out some of the butterflies and used turquoise pearls by Jolee's to make the bodies of the butterflies. I also cut out photo corners from the Anna Griffin paper with my Paper Shaper punch. I used Pioneer clear photo corners to adhere the picture to the right side of the background paper. I printed out the lyrics to "My Wish" onto Stampin' Up! Soft Sky paper and used my Fiskars paper trimmer to separate the lines from each other. Then I used my Herma adhesive runner (EK Success) on the back of each line of the lyrics and attached them on the left side of my 12" x 12" page. I placed a photo corner in the lower left and upper right corners of the photo, put a small butterfly in the upper left corner, and placed a large butterfly and a smaller butterfly at the bottom right of the photo. I used a couple of pop dots to lift up the larger butterfly's wings to add dimension to the page.


Sunday, January 22, 2012
Day 22: Fast Butterfly Cards
I wanted to make a dozen cards in a short amount of time, so I used one butterfly punch, four different patterned papers, white cardstock, glue dots, and pearls, and had my cards made in about an hour!! A lot done in a little bit of time.


Saturday, January 21, 2012
Day 21: How to Make Notepad and Pen Sets
Like yesterday, I continued to make notepad and pen sets for the Walk to Emmaus spiritual renewal program. I will tell you how I made them.
Supplies:
*tape runner or other adhesive
*3" x 5" scratch pads (no front cover)
*.25 inch wide double-sided tape ( I recommend Terrifically Tacky Tape by Provo Craft)
*.50 inch wide double-sided tape ( I recommend Terrifically Tacky Tape by Provo Craft)
*scrapbooking paper of your choice
*ribbon that matches your scrapbooking paper, about .5 inch wide
*Pentel R.S.V.P. pens
*white cardstock (by Georgia Pacific, available packaged at Wal-mart for about $5 for 15o sheets, so don't pay by the sheet at the scrapbook stores).
Directions:
Notepad:
I purchased blank scratch pads (no front cover) from an office store that measure 5" long x 3" wide. I used a 3-inch long piece of half-inch wide double-sided tape along the top edge of the pad, and folded the excess onto the cardboard backing. Then I cut a 3" wide strip from an 8.5" x 11" piece of white cardstock. The length of the white cardstock strip will cover the front and back covers of the notepad and help to strengthen it. Remove the liner of the double-sided tape from the top edge of the notepad. Place the bottom of the white cardstock strip at the bottom of the notepad, creasing it and pressing the creased portion onto the double-sided tap when you get to the top edge of the pad. Cut a 3" wide strip from your scrapbook paper. Cut it to 5.5" or 6" in length. Use another piece of the double-sided tape on the edge of the white cardstock cover and remove the liner. Line your scrapbooking paper up at the bottom of the notepad, and fold the excess over the top of the notepad onto the back side. (I did this so I could make covers for two notepads from one 3" strip of scrapbook paper.) Cut a 3.5" piece of ribbon to make the loop that holds your pen. Put a small piece of double-sided tape (about .5 inch") on each end of the ribbon (one side only). Take the liners off the double-sided tape. Wrap the ribbon around the pen to gauge how big of a space is needed for the pen. Leave that amount of ribbon visible on the right side of the notepad and hide the rest in between the white cardstock and the brown cardboard backing. (The double-sided tape should be facing the white cardstock on one side of the ribbon and facing the cardboard backing on the other side. I also put a small piece of the double-sided tape in between the two ends of the ribbon to create a tighter hold.) Use your adhesive to attach the white cardstock to the cardboard back and to attach the white cardstock to your scrapbook paper cover. Trim the excess cardstock and scrapbook paper from the bottom of the notepad.
Pen Insert:
Cut a strip of scrapbook paper that is .75 inches wide and 3 and 5/16 inches long. On the back side of your scrapbook paper, attach a piece of the .25 inch wide double-sided tape to one long side of the strip. Leave the liner on. Fold the scrapbook paper over the double-side tape, and then repeat, so you have three sections of the paper. Remove the liner from the double sided tape, and attach the 3rd section of scrapbook paper (design side out) to the double-sided tape, creating a small tube of your scrapbook paper. Remove the black end of the pen by unscrewing it. Take out the pen insert and slide it into your scrapbook paper tube. (This will help open it if it folded flat.) Then slide the pen insert and paper tube back into the pen and replace the black end of the pen. Voila...a matching pen and pad set!
Friday, January 20, 2012
Day 20: Girls' Night Out
Our church offers Girls' Night Out once a month, so my friend Michelle and I attended together. She worked on her son's tae kwan do album while I worked on notepad and pen sets. I used scrapbook paper that had the lyrics to Amazing Grace (paper by Flair Designs) and the "There is a time for everything" scripture from Ecclesiastes 3:1-8 (paper by It Takes Two) to make the covers for the notepads and the inserts for the pens. I am making the notepad and pen sets to give to people who attend the local Walk to Emmaus spiritual renewal program. I attended Walk to Emmaus last summer and Jesus really put it on my heart to make some different choices in my life. As a way of giving back for all the love, grace, and prayers that were given to me, I decided I would make notebook and pen sets for the new pilgrims who attend Walks after mine.


Thursday, January 19, 2012
Day 19: It's A Pirate Card For Me!
I needed some boy birthday cards, so I made half a dozen cute pirate cards today. I used Nearly Navy cardstock from Stampin' Up! as my card base, and a striped print from The Paper Studio as a layer on top of the navy. Using a pirate stamp from Great Impressions, I stamped on Very Vanilla cardstock (Stampin' Up!) and then colored in the stamped image. I used Koh-I-Noor Hardmuth Colour Pencils (woodless) and Gamsol Odorless Mineral Spirits to color the pirate and his treasure chest. This was based on a technique I learned while at a stamp show from Inky Antics Rubber Stamps. The sentiment on the inside of the card reads: "Cheers to ye birthday boy! Now, draw ye sword and cut ye cake." I found the sentiment on the e-how.com website. I now have some cute cards for the boy birthdays coming up.


Wednesday, January 18, 2012
Day18: Grandparent's Day Page
Tonight I worked on a page of my daughter and her grandmother that was taken at school on Grandparents' Day. After going through my paper stash, I had 22 different papers I thought would work with the Make a Wish page. (I rarely do a "matching" two-page layout; I usually coordinate my papers. I guess I get bored with matchy-matchy!) I knew having an obsession with buying paper would pay off!! The perfect paper was among those 22!! This paper has a green background that looks really good with the green letters I used on the facing page. It has pink, gold, and white flowers, which play off the colors I used on the the Make a Wish page. The paper is from the White Out Collection by We R Memory Keepers and is called Hoopla-Merry. It looks like somebody spilled a bottle of "white out" all over the outside edges. I used pink (Heidi Grace Designs) and white letters (American Craft) to spell out Grandparents Day and the date. I also used a foam brush and spread some Mod Podge over the stickers so they wouldn't curl up (a hazard of being moved around several times). I really didn't embellish this page very much. I added a couple of flower brads and 2 small corners (Thickers). It seemed like it needed to be a little calmer because the opposite page has a lot going on.


Tuesday, January 17, 2012
Day 17: Make A Wish
I finished my page of my daughter blowing the dandelion flower. I have this pom pom trim that put me in mind of the white dandelions going to seed, so I used that, some lace, a pink ribbon from Stampin' Up!, some pearl daisy buttons (Buttons Galore) with the shanks removed, and some cardstock letters from Provo Craft to make a title of "Make A Wish" on rose red cardstock from Stampin' Up!. The title block was inspired by Trudy Sigurdson's book Embellished Emotions for Scrapbookers. My background paper was designed by Susan Winget for K & Company. While you can't see a lot of the paper, the sandy tan color, and rose and green in the background helps to pull all the elements together.


Monday, January 16, 2012
Day 16: Embossing a Background
From the time the kids were little, they have always blown the fluffy white dandelions off their stems and made a wish. I took photos of them doing that and tonight I was working on my daughter's scrapbook page. Using VersaMark ink, I stamped several of Penny Black's "lace flower" stamp on white vellum. I poured white embossing powder (Stampin' Up!) on the blooms, shook off the excess, and then poured green embossing powder (Stampin' Up!) on the stems, shook off the excess, and then heated with my heat tool (Stampin' Up!). I really like the effect. It looks like the dandelions are blowing around in the wind, and the vellum adds a softness to the page I like. I still have more to do on this page, but it is late, so I will get back to it tomorrow.
Sunday, January 15, 2012
Day 15: Bits and Pieces
Tonight I finished up the last two pages I'd been working on. I stamped "This scrapbook page completed by" (Stampin' Up!) onto some scrap cardstock and attached it to the back of each page, signed my name and dated it. I also listed the products used and the makers on the back of the page. If I ever need that information to enter a contest, etc., it is handy. I have a notebook I started, but I think this will actually work better as the information is right there on the page itself.
I always flip back through my kids' scrapbooks as I add pages, to get a feeling for how the book is flowing. I don't work in themes; I work chronologically. The first page in this scrapbook starts with a photo of Christmas 2008. However, when you turn that page, the next two are photos from March 2009. I kept thinking every time I flipped through that I really needed to find a way to make the 2009 date more evident, especially on those two pages. So, tonight, I took the time to add year stickers to both those pages. Luckily, I still have the same style stickers I'd used for the titles.
I also selected the papers for the next two pages of my daughter's scrapbook, and found a stamp that I want to use for one of the pages.
So, just bits and pieces tonight. No real project completed. A little finishing up. A little revamp. And a little planning ahead. But that's okay. My goal is to get in the scrapbook room each day this year and I have been doing that. It feels good.
Saturday, January 14, 2012
Day 14: Spring Recital Scrapbook Page
Tonight (while running into the other room to watch parts of the Miss America Pageant), I made the companion page to my daughter's dance page. In this photo, she and my son are pictured. He had a tumbling routine to perform and this photo was one taken of the two of them together. Since they both had yellow in their costumes, I chose three papers in So Saffron from the Tea Party Designer Paper Series by Stampin' Up! The base page had a large airy white floral print. On top of that I layered a paper with pale purple and saffron flowers. This helped to tie in the purple tones on my daughter's page completed yesterday. The mat for the photo had white polka dots, which echoed the polka dots on my daughter's outfit. I placed the photo on top, adhering it with clear photo corners by Pioneer. In the upper left and lower right corners, I placed purple metal photo corners from The Paper Studio. Since this photo is horizontal, I left a space at the bottom of the page for a title. I used a hodge podge of pale letters to create my title. I added a flower I made from green, purple, and pink silk flowers and secured with a pink glitter brad to the center of the title. The flower tied in to the one my daughter was wearing in her hair and also carried over the colors from the facing page.


Friday, January 13, 2012
Day 13: Beautiful Dancer Scrapbook Page
My daughter was in a dance recital and her costume was a pale green sheer material. To match it, I chose papers from Tea Party Designer Paper Collection by Stampin' Up! I used patterns of varying sizes so the eye would not be overwhelmed by all the variety of papers. I selected a paper with a green background with a small pink and yellow flower design for the base of the page. Using a die-cut paper I had, I traced around it and cut out a die-cut shape from a pink paper with white flowers. I layered the pink die-cut on top of the green base. Then I cut a rectangle from a pale purple paper with purple, yellow, and pink flowers as the mat for my daughter's photo, and layered that atop the pink die-cut. I attached the photo with clear photo corners by Pioneer. I used two pink metal photo corners by The Paper Studio in the bottom left and upper right corners of the photo. I cut two pink flowers from another of the coordinating papers, then layered a silk green and a silk pink flower on top of each, and secured the layers with a pink glimmer brad. I liked how the silk flowers carried on the light and airy feeling of my daughter's dress. I attached one flower in the upper left corner of the photo and the other flower in the bottom right corner of the photo. And that is how I created a scrapbook page for my beautiful dancer.


Thursday, January 12, 2012
Day 12: Getting Organized
Today I spent a couple of hours just organizing my craft area. It seems like my desk is always buried! I have bought baskets, etc., with the best of intentions to corral my tools while I am crafting, but I never seem to use them when in the process. I just pile stuff. So, I got busy and put things back where they belong. I also sorted through some of my embellishments and found things I did not even know I had! I know I can be more satisfied with my crafting if I know what items I have to use.
I also planned out two more pages for my daughter's scrapbook album. I selected papers that match the clothes/setting, found flowers to embellish the pages with, and selected coordinating ribbons. I am using the Tea Party Designer Paper from Stampin' Up! and the matching ribbon. It will be fun to put it all together tomorrow!
I also planned out two more pages for my daughter's scrapbook album. I selected papers that match the clothes/setting, found flowers to embellish the pages with, and selected coordinating ribbons. I am using the Tea Party Designer Paper from Stampin' Up! and the matching ribbon. It will be fun to put it all together tomorrow!
Wednesday, January 11, 2012
Day 11: Anna Griffin Card Kit is Finished!
I spent a couple of hours today finishing up the Anna Griffin cards, and then photographing them. I now have 30 cards ready to give to friends and family. Here are a few photos:


Tuesday, January 10, 2012
Day 10: Embellishing Anna Griffin Cards
Today I embellished some of the Anna Griffin card bases I made yesterday. Anna gives you everything you need (except adhesives) to put the cards together. The hard part was trying to decide which 3-D flowers to use on each card. I think I would have gotten a lot more done if I wasn't so particular! However, I am pleased with the results so far.


Day 9: Anna Griffin Cards
I had some computer issues yesterday, so while I did manage to build bases for 27 more cards from my Anna Griffin kit, I couldn't blog about it until today.
Anna's system for making her cards is simple. You start with one of her prints in the heavy cardstock as the card base, add a second design cut just a little smaller than the card base and layer that atop of the base, and then embellish using her wonderful 3-D stickers.
Anna's system for making her cards is simple. You start with one of her prints in the heavy cardstock as the card base, add a second design cut just a little smaller than the card base and layer that atop of the base, and then embellish using her wonderful 3-D stickers.
Sunday, January 8, 2012
Day 8: Anna Griffin Birthday Card
It was a busy day today. We went to church and stayed for lunch and fellowship, then home to take down the Christmas decorations. We were also trying to get laundry done. Ate a light supper and then off to a Cub Scout Committee Meeting. So, not too much time today to craft. I managed to straighten up two storage drawers in the scrapbook room. And, dah tah dah! I made my mom a birthday card using the Anna Griffin Birthday Card Kit I bought from HSN. I love how quickly her cards go together, yet they are so elegant. An easy way to end this rather busy day.


Saturday, January 7, 2012
Day 7: Stampin' Up! On Board Bitty Book Completed!
Today I decorated the slide-in case that the On Board Bitty Book album is kept in. I titled it "About a Boy". On the back side of the storage box, I used a hodge-podge sticker alphabet to declare: "no one knows the joys of a boy like his mother". I am glad I have such a great little boy who brings me great joy, and I am pleased to have this project done for him.

Slide-in Case Front Cover

Slide-in Case Back Cover

Slide-in Case Front Cover

Slide-in Case Back Cover
Today I decorated the slide-in case that the On Board Bitty Book album is kept in. I titled it "About a Boy". I used a ribbon that says " a boy is a joy" along the spine of the album, and on the back side of the storage box, I used a hodge-podge sticker alphabet to declare: "no one knows the joys of a boy like his mother". I am glad I have such a great little boy who brings me great joy, and I am pleased to have this project done for him.
Friday, January 6, 2012
Day 6: Stampin' Up! On Board Bitty Book
I waited until the last hour of the day, but I was able to get 20 pages cut to make a mini photo album for my son's wallet-size photos. I used the On Board Bitty Book (now retired) and the Pawsitively II Prints designer paper from Stampin' Up! (It goes with their Build-A-Bear® stamp sets). It is really cute primary stripes, plaids, dots, and even argyle. It is going to be adorable when I get it all done!


Thursday, January 5, 2012
Day 5: Desk Sets

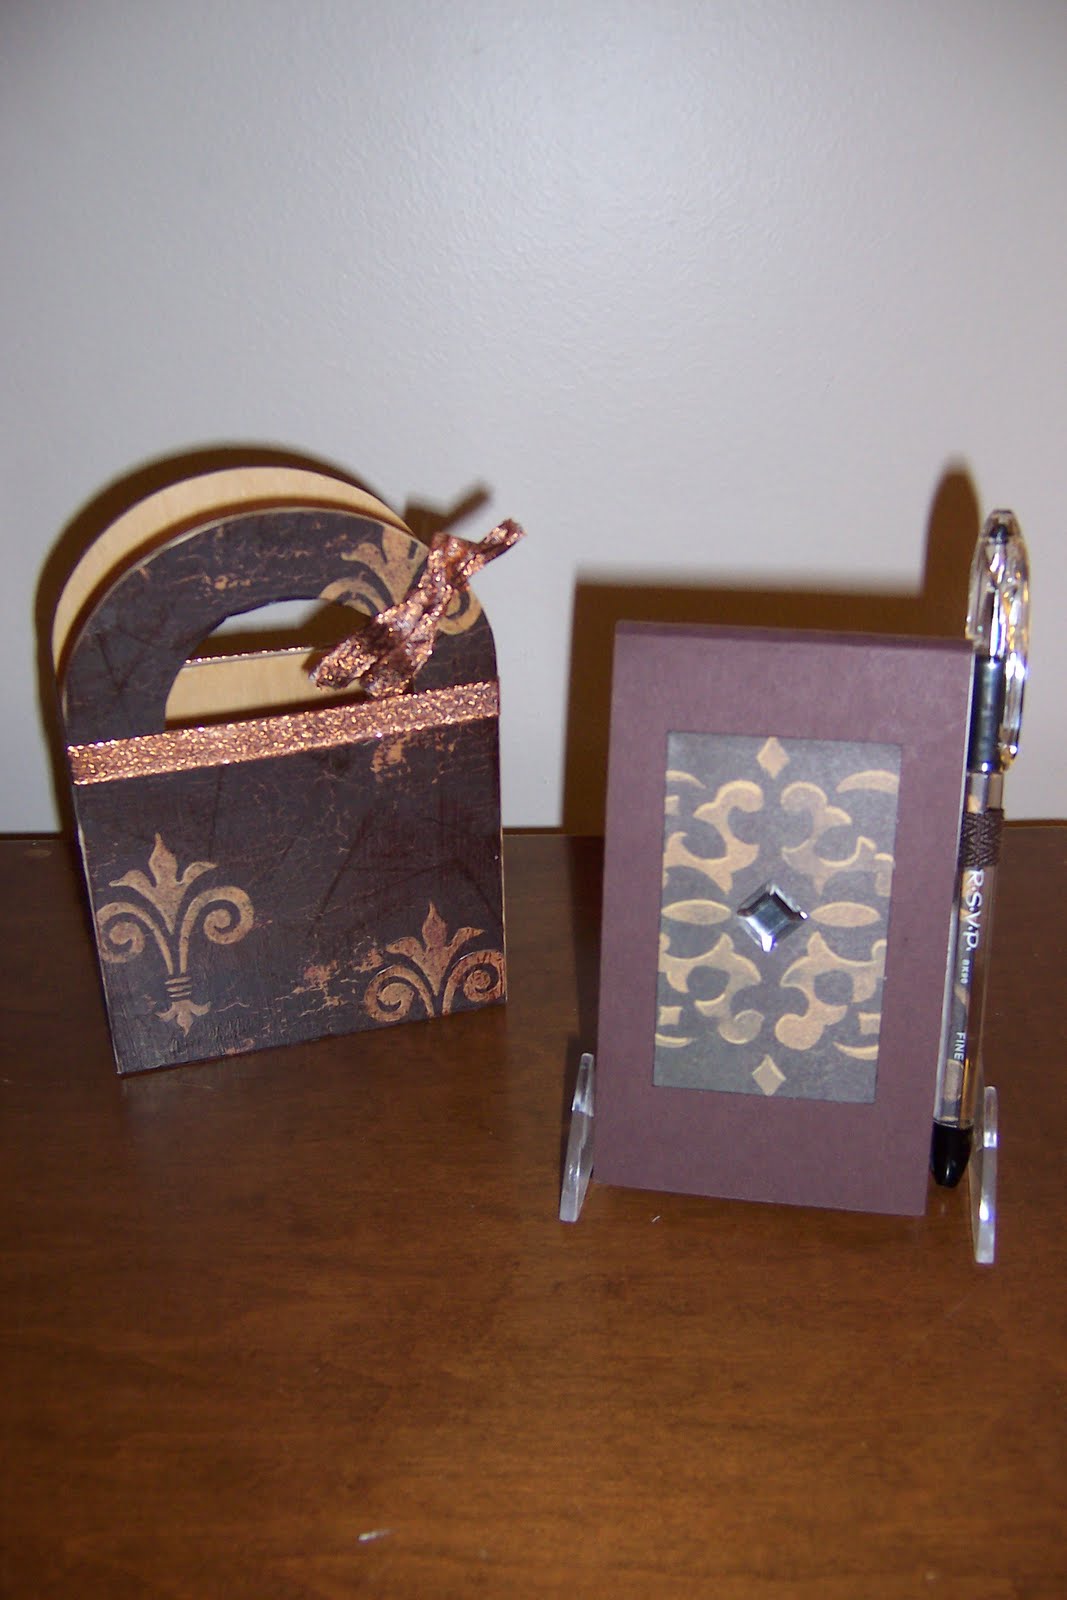

Today, I worked on making desk sets. I covered wooden "gift bags" with scrapbook paper, and made a coordinating notepad and pen set that fit in each "gift bag". These would look great on a desk, bedside table, or telephone stand and would be so handy when you need to make a quick note about something.
Wednesday, January 4, 2012
Day 4: Layer Upon Layer
Tonight I worked on another photo of my daughter. I started with a 12" x 12"green rose floral paper from Stampin' Up! I cut a square approximately 3" x 3" out of the center of the paper so I could punch out matching photo corners. I used double sided tape to adhere matching green ribbon down the left side of the page, about an inch from the edge. Then I put an 8.5" x 10.5" soft floral with cream background on top of the ribbon and the green rose floral paper (covering up the hole I made). Then I placed my daughter's 8"x 10" photo on top of the cream floral paper. I placed the four photo corners halfway on the cream paper and halfway on the corners of the photo. In the upper left hand corner of the photo, I used a pale pink swirl embellishment by Prima and three Prima silk flowers in various shades of pink (effectively covering up that photo corner). Starting approximately 1/3 of the way from the bottom left hand side of the matted photo, I used epoxy letters in shades of green, pink, and cream to spell out the word "Beautiful". I love to layer papers and embellishments and I think this was a gorgeous way to scrapbook my beautiful girl.


Tuesday, January 3, 2012
Day 3: Ruffles and Trims, Oh My!
Today I scrapped a photo of my daughter on her birthday. She was wearing a pink and cream dress that was layers and layers of ruffles, so I used light pink and dark pink ruffled trim down the right side of the 8 x 10 photo, a little bit of white daisy lace (with pink flower centers) diagonally across the top left corner of the photo. This was all atop a pretty piece of pink floral designer paper from Stampin' Up! Voila, a wonderful page in a little bit of time.


Monday, January 2, 2012
Day 2: Playing with Plastic
I just love all the clear little embellishments that are on the market place for scrapbookers or stampers to use. But, I don't want to have to pay the price. So, whenever one of the kids gets a toy, I take all the clear acetate plastic out of the box and save it. Today, I finally took the time to see what I could make with this free-to-me material.
I got out my Sizzix Big Shot machine and tried out sizzlits, embosslits, Bigz dies, and my embossing folders. I also got out some punches to see what I could to do with those.
I tried the sizzlits first because I have some snowflakes that I thought would be pretty on a card or scrapbook page. The snowflakes embossed well, but they didn't cut out. I tried running them through the Big Shot, then backing them out, running them through, and backing them out again, but that still didn't work. I ended up cutting them out by hand. It was a little time consuming, but I still like the look.
The embosslits embossed and cut out nicely, so that was a winner! The Bigz dies also cut out well; another winner! I tried a snowflake embossing folder; I think this will make for a nice layering piece on a card. I also dug through my punch drawer and tried out some punches. Also a success!
I had fun playing with plastic today, and if you haven't tried it yet, you should. I think it will really expand your range of embellishments for cards and scrapbook pages.
Sunday, January 1, 2012
Day 1: UFO Finished: Super Hero Paper Bag Album
I spent a lot of 2011 wishing I took more time to work in my scrapbook and stamp room. However, I did nothing to ensure that I did that. This year, I have decided to challenge myself to work on a scrapbook or stamp project every day of 2012!! We all have those UFOs (unfinished objects) that we keep meaning to get done. And there are all sorts of techniques that we would all like to try. To that end, I will be working and blogging each and every day this year! I have been working on a super hero paper bag album for my son since August or September of 2011. I worked on it here and there, but never really set about finishing it. My goal for today was to get that UFO finished! And I did. A great way to start off the new year!

Album Cover

Spider Man Pages

Power Ranger Pages

Back Cover

Storage Box

Album Cover

Spider Man Pages

Power Ranger Pages

Back Cover

Storage Box
Subscribe to:
Comments (Atom)