I created these two cards for The Paper Forest Scrapbook Boutique with products from Little Yellow Bicycle's Acorn Hollow line of products, a leaf punch from EK Success, and my Big Shot and dies from Sizzix.
Showing posts with label Little Yellow Bicycle. Show all posts
Thursday, November 15, 2012
Wednesday, November 14, 2012
Day 319: Little Yellow Bicycle Acorn Hollow Scrapbook Page
Today I created this scrapbook page for The Paper Forest Scrapbook Boutique, a new scrapbook store that opened in Washington, Illinois. Products used are from the Acorn Hollow line by Little Yellow Bicycle, Stampin' Up! (lace), and Tim Holtz (metal photo corners).
Thursday, August 2, 2012
Day 214: Tag Football
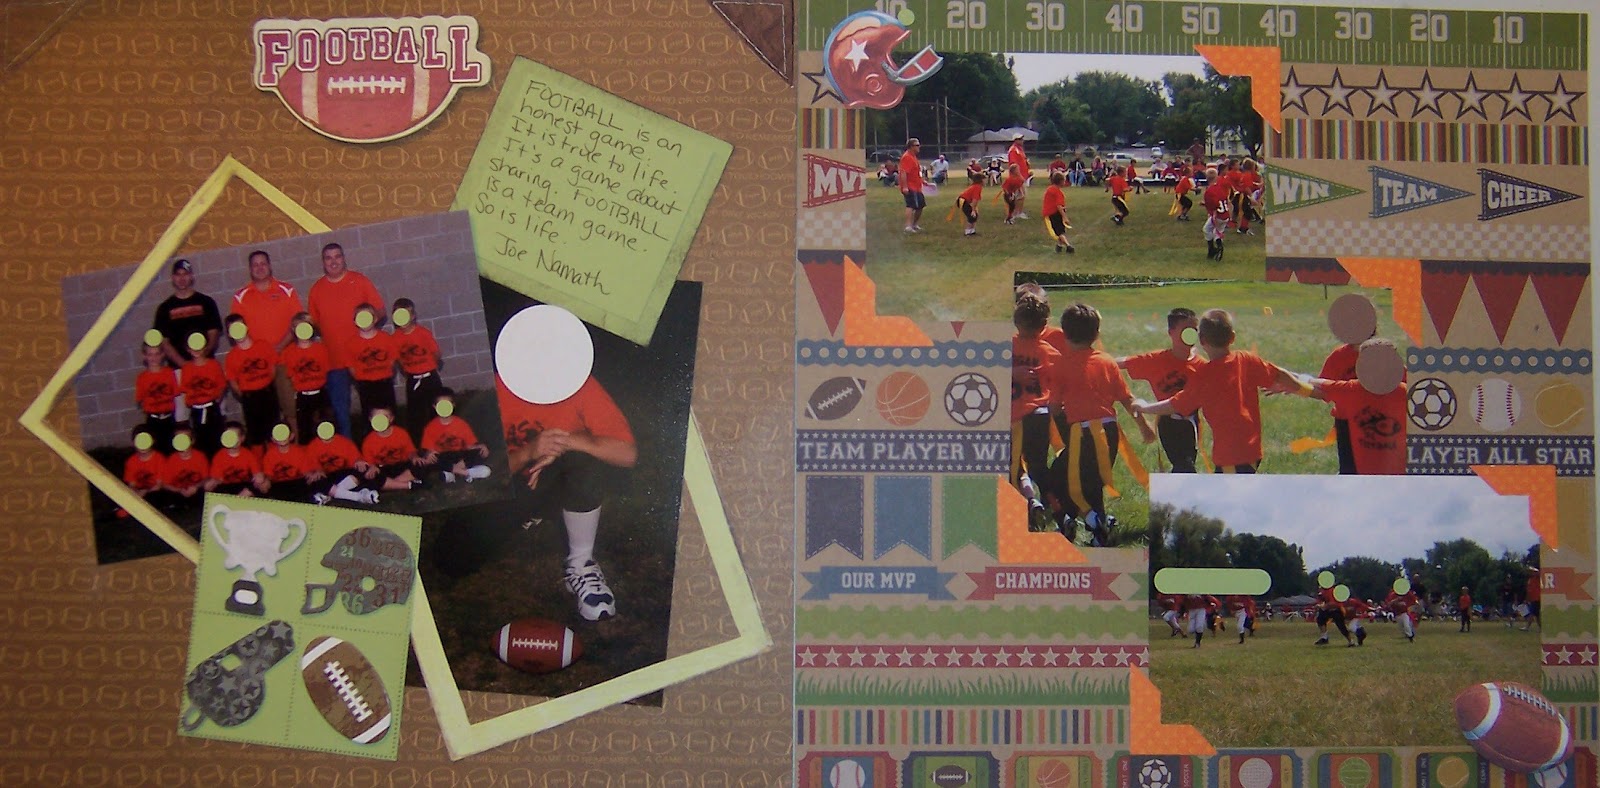
For this football layout, I used paper from Bella Blvd as the background on the left page. I framed my son's team photo and individual photo with a frame from Wild Asparagus. I used a similar color green card stock from Stampin' Up! as background for the Joe Namath quote and the grid with the chipboard football icons. The grid stamp was actually part of a 6-frame postage stamp by Just for Fun. Ink was StazOn by Tsukineko.The chipboard title and football icons are by Little Yellow Bicycle. The "leather" corner triangles have been in my stash for ages. They are from Fresh Cuts by Rebecca Sower.
The right page features paper from Jillibean Soup. I simply added some orange photo corners (paper by Bo Bunny) to bring out the orange shirts of the players and to give a little pop from the busy background. I had some sports stickers in my stash, and added the football and helmet to give the page a little more dimension.
While these two pages aren't matchy-matchy, I think the green on the left page ties in with all the grass in the photos on the right page. I also needed something to brighten those dark photos, since they were taken in the early evening and the light was not optimal. I think the orange shirts were tied in on both pages with the use of the orange photo corners.
The right page features paper from Jillibean Soup. I simply added some orange photo corners (paper by Bo Bunny) to bring out the orange shirts of the players and to give a little pop from the busy background. I had some sports stickers in my stash, and added the football and helmet to give the page a little more dimension.
While these two pages aren't matchy-matchy, I think the green on the left page ties in with all the grass in the photos on the right page. I also needed something to brighten those dark photos, since they were taken in the early evening and the light was not optimal. I think the orange shirts were tied in on both pages with the use of the orange photo corners.
Wednesday, August 1, 2012
Day 213: Baseball Layout
For this baseball layout for my son, I selected the baseball stitching paper by Echo Park Paper and a baseball collage by Little Yellow Bicycle as my backgrounds. For the left page, I added the ball glove by Reminisce on top of the stitch paper, added a chipboard "baseball" title from Little Yellow Bicycle to the top of the glove, added the team photo, and then added 4 baseball tokens from Doodlebug Designs to each corner of the photo. For the right page, I selected 3 photos from one of his games, added 2 of his baseball cards (one front and one back), and embellished the page with a chipboard baseball and bat from Little Yellow Bicycle.
Tuesday, July 31, 2012
Day 212: #1 Soccer Player
Tonight I worked on 2 soccer pages for my son.
For the left page, I used a soccer background from Bella Blvd, the big round soccer ball paper from Reminisce, chipboard embellishments "soccer" and "#1" from Little Yellow Bicycle, and soccer ball stickers from Karen Foster Designs. I think it is pretty self-explanatory how this page went together, so I won't give details about what I did.
For the right page, I used a soccer collage paper from Little Yellow Bicycle as the background. I selected 3 photos of my son and cropped them to fit inside the postage stamp frames (die and Big Shot machine by Sizzix; black card stock by Stampin' Up!). In the center of the two larger photos, I added a "soccer champ" sticker by Karen Foster. I used my date stamp from Office Max to stamp the month and year around the cluster of photos. I used three epoxy soccer stickers from EK Success to add a triangle shape to the paper that helps to keep the eye moving across the page. I added some info about the team, coach, etc., to the words at the bottom of the page with a journaling pen from Creative Memories. Finally, I added my son's "soccer card" photo to the bottom right of the page and tucked another soccer ball sticker under the left side of the picture, further adding to the collage effect.
For the left page, I used a soccer background from Bella Blvd, the big round soccer ball paper from Reminisce, chipboard embellishments "soccer" and "#1" from Little Yellow Bicycle, and soccer ball stickers from Karen Foster Designs. I think it is pretty self-explanatory how this page went together, so I won't give details about what I did.
For the right page, I used a soccer collage paper from Little Yellow Bicycle as the background. I selected 3 photos of my son and cropped them to fit inside the postage stamp frames (die and Big Shot machine by Sizzix; black card stock by Stampin' Up!). In the center of the two larger photos, I added a "soccer champ" sticker by Karen Foster. I used my date stamp from Office Max to stamp the month and year around the cluster of photos. I used three epoxy soccer stickers from EK Success to add a triangle shape to the paper that helps to keep the eye moving across the page. I added some info about the team, coach, etc., to the words at the bottom of the page with a journaling pen from Creative Memories. Finally, I added my son's "soccer card" photo to the bottom right of the page and tucked another soccer ball sticker under the left side of the picture, further adding to the collage effect.
Thursday, July 19, 2012
Day 200: Future Football Star Scrapbook Page
I always get my kids' photos taken at Sears Portrait Studios. They always do a really nice job on them! My son really wanted to take a photo with him catching the football. The photographer managed to get the shot, then converted the photo to black and white, added two small color insets of other photos, and then did this great title "Future Football Star" and my son's name in an orange font with a royal blue shadow. Orange is my son's favorite color, and the royal blue matched his shirt. In order to keep most of the focus on the photo collage, I used a "varsity" numbers background paper from Jillibean. I added two title strips from Creative Memories to make help emphasize the royal blue and orange font on the photo collage. Then I added two arrows (Little Yellow Bicycle) pointing up, to help draw the eye up to the football in the photo.
Wednesday, July 18, 2012
Day 199: Touchdown Scrapbook Page, Continued
Today I continued working on the "Touchdown" football page of my son. My chipboard letters were dry, so I added some silver dots to the letter "D"( it was manufactured by Deja Views) to match the "MVP" letters made by Little Yellow Bicycle. I used StazOn ink from Tsukineko and silver (heat) embossing powder from Stampin' Up to alter the color of some star clips purchased from Oriental Trading Company. These added a little bit of pizzazz to the dark letters, and, also covered up a flaw in the letter V. Sometimes having to fix mistakes or flaws ends up adding a little extra "something-something" to your work! I also ended up trimming my son's 8" x 10" photo to 4.25" x 10" so that more of the football would show. Don't be afraid to crop your photos...all I lost was some blue background , but I gained a much more interesting scrapbook page because I used an unusually shaped photo.
Wednesday, June 27, 2012
Day 178: My Star
Since this is a birthday photo of my son, I wanted to focus on the number 7 and not so much on the football, so I put a piece of red paper (DCWV) behind this blue paper with a punched-out star design. (This was in my stash, sorry I don't know/remember the manufacturer.) I used another piece of the red from DCWV underneath the photo. The big triangle acts like a giant photo corner. I ran a small strip of red paper behind the photo to help carry the red color to the top of the page. I accented the red strip and the corner of the page with some star ribbon from my stash. I made a banner from the star and pennant chipboard pieces (Little Yellow Bicycle), a metal rod from K and Co., and some baker's twine from We R Memory Keepers. I used a Stampin' Write marker (Stampin' Up!) to write Happy 7th Birthday on the pennant. I placed chipboard stars (Little Yellow Bicycle) in the center of each punched out start and then topped them off with metallic spirals from a kit by Creative Impressions.
Subscribe to:
Posts (Atom)